
How to fit a new meter box cover
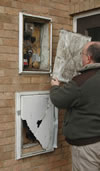
Steps 1 & 2

Steps 3,4 & 5
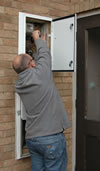
Steps 6,7 & 8
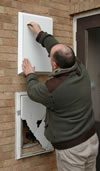
Steps 9, 10 & 11
- Remove the old door if it is still present
- Remove all packaging from the new unit and remove the key on the back of the door.
- Open the door with the key
- Offer the new unit up (it should slide over the existing unit)
- It may be necessary to adjust the frame to accommodate non-standard gas installations
- Mark one side of the composite box with a marker pen or similar
- Drill four small holes at the marks to suit the screws
- Offer up the unit again and secure the one side of the metal meterbox with four screws
- Use the spirit level to to make sure the box is straight
- Mark the other side of the composite box with a marker pen or similar
- Drill four small holes at the marks to suit the screws
- Secure the two other brackets with four screws, fastening to the internal composite box
- Close the door and secure locks
- We recommend that the top edge and sides are bonded to the wall with a suitable silicone seal
- Tidy up and dispose of all rubbish in an environmentally friendly way
Recommended tools
- Marker pen
- Drill
- Drill bit to suit screws
- 4 x 13 mm self-tapping screws
- Suitable screw driver
- Spirit level
- External silicone
- and about ten minutes of your time.
Gas: England, Scotland, Wales 0800 111 999
By following the simple directions you should be able to fit the new MeterBox cover to your broken plastic meter box.
Remember electricity and gas can kill please ensure that you are able to safely carry out the installation. If for any reason you decide that the installation carries a risk DO NOT proceed but contact the utility company on the emergency call out number.
Electricity: varies depending on location see telephone book